
Furnace Filters, Frequency, and What Happens When You Forget

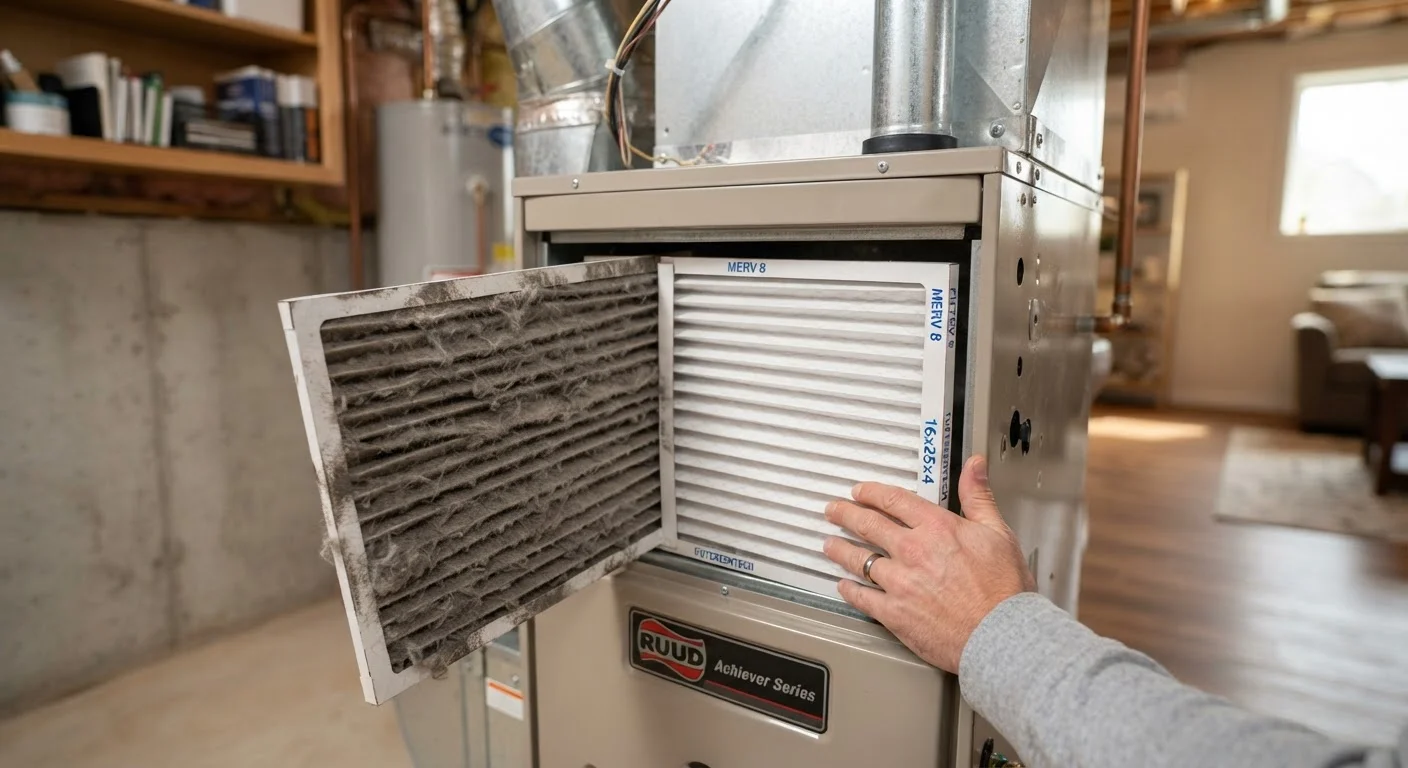
Photo: AskSpecialist.net editorial
Key Takeaways
- Most furnace filters should be replaced every 1-3 months, depending on filter type and household conditions.
- A clogged filter forces your HVAC system to work harder, raising energy bills and shortening equipment lifespan.
- Neglected filters can degrade indoor air quality by allowing dust, allergens, and debris to circulate freely.
- Choosing the right MERV-rated filter for your system is as important as changing it on schedule.
- Setting a calendar reminder is the most reliable way to stay on a consistent filter-change routine.
Why Your Furnace Filter Matters More Than You Think
The furnace filter is your HVAC system's first line of defense. Its primary job is to trap airborne particles - dust, pet dander, pollen, mold spores, and other debris - before they enter the blower and heat exchanger. A clean filter keeps airflow steady and the system running efficiently. A clogged one does the opposite: it chokes off airflow, stresses the blower motor, and forces the system to work harder to push conditioned air through your home.
The consequences of a neglected filter stack up quickly. Restricted airflow causes the heat exchanger to overheat and can trigger safety shutoffs. Over time, the added strain shortens the lifespan of the blower motor - a repair that can cost several hundred dollars. A severely blocked filter may even allow debris to bypass the media and coat internal components, compounding the damage. Much like deferred car maintenance, small oversights compound into expensive repairs that could have been avoided with routine attention.
Check Before You Assume the Schedule
Beyond equipment health, there's an indoor air quality dimension. When filters are overloaded, they can no longer effectively capture particles, allowing allergens and fine dust to recirculate through your living spaces - a particular concern for households with asthma or allergy sufferers.
How Often Should You Change Your Filter?
Filter replacement frequency depends on two variables: the type of filter you use and your household's specific conditions.
- Fiberglass (1-inch flat-panel) filters: These are the least expensive and least effective option. They should be replaced every 30 days.
- Pleated 1-inch filters (MERV 7-12): The most common choice for residential use. Replace every 60-90 days under normal conditions.
- High-efficiency pleated filters (MERV 13+): Excellent particle capture, but their density can restrict airflow in systems not designed for them. Follow manufacturer guidance - typically every 6-12 months.
- Thicker media filters (4-5 inch): Often found in whole-house filtration setups. These may only need replacement once or twice a year.
Household conditions also shift the baseline. Replace filters more frequently if you have:
- One or more pets (pet hair and dander load filters faster)
- Allergy or asthma sufferers in the home
- Recent renovation or construction activity nearby
- A heavily occupied home or one with multiple residents
A single-occupant home with no pets and a mild climate may be able to stretch toward the longer end of any recommended interval. When in doubt, check your filter monthly until you learn your home's normal rate of accumulation.
Don't Choose a Filter Your System Can't Handle
What You'll Need Before You Start
Changing a furnace filter requires no special tools, but having the right supplies on hand makes the job clean and quick.
What you will need
Replacement furnace filter
The core supply needed - sized correctly for your system and rated appropriately for your household's air quality needs.
Plastic bag
Used to contain the dirty old filter during removal and transport to the trash without spreading debris.
Permanent marker
Used to write the installation date on the new filter's frame for easy reference at the next change.
Flashlight
Helpful for inspecting the filter compartment and surrounding ductwork in low-light utility areas.
Step-by-Step: Changing Your Furnace Filter
Turn Off Your Furnace
Locate your thermostat and switch the system to Off - not just to a lower temperature setting. For added safety, consider switching the fan setting from Auto to Off as well. This stops airflow through the system while you work, preventing unfiltered air from being pulled into the blower and keeping loose debris from circulating.
Locate the Filter Compartment
The filter is typically located in one of two places: inside the furnace itself at the return air intake, or in a dedicated slot in the return air duct closest to the air handler. If you're unsure, check your furnace owner's manual - the filter location and correct filter size are almost always documented there. The compartment is usually a simple slot or hinged panel that opens without tools.
Remove the Old Filter
Slide the old filter straight out, taking care not to shake or jostle it, which can dislodge collected debris back into the system or the room. Hold it flat and immediately place it in a plastic bag for disposal. Note the filter's dimensions printed on the cardboard frame (length × width × depth in inches) - you'll need these for the replacement.
Insert the New Filter
Unwrap your replacement filter and check the airflow direction arrow printed on the cardboard frame. This arrow must point toward the furnace (away from the return duct, toward the blower). Inserting a filter backward significantly reduces its effectiveness and can damage the system. Slide the new filter firmly into the slot until it sits flush with no gaps around the edges - gaps allow unfiltered air to bypass the media entirely.
Close the Compartment and Restore Power
Close the filter compartment door or panel securely. Return your thermostat to its normal operating settings. Write today's date on the new filter's frame with a permanent marker, and set a calendar reminder for your next change based on your filter type and household conditions.
Staying on Schedule Going Forward
The most reliable system is one that removes the need to remember. Write the installation date directly on the cardboard frame of each new filter with a permanent marker - it takes two seconds and tells you at a glance when it went in. Then set a recurring calendar reminder on your phone for your chosen interval.
Buying filters in multi-packs is a practical way to keep a supply on hand so you're never delayed by a trip to the store. Store them flat in a dry location to preserve the filter media before use.
Finally, treat filter changes as part of a broader seasonal maintenance rhythm. Spring and fall are natural checkpoints - coinciding with the transition between heating and cooling seasons - when it makes sense to inspect not just the filter but the surrounding system components. Just as you'd use a maintenance schedule to stay ahead of car repairs, a home maintenance calendar keeps HVAC care from becoming reactive and costly.
The content on this site is provided for informational purposes only and should not be considered a substitute for professional advice. While we strive to provide accurate and up-to-date information, we make no guarantees regarding its completeness or accuracy. Always consult a qualified professional for advice specific to your circumstances before making any decisions.